Building emails with Beefree.io
Leveraging a drag and drop email builder is a fantastic avenue for marketers to take when they want to build emails at scale.
Drag and drop builders provide a low barrier to entry when the email marketer lacks the resources or knowledge to build emails from HTML scratch.
And ESPs are picking that up. Braze, Iterable, and Customer.io all have white labelled beefree.io. if you haven’t used any of these marketing automation tools, and want to get acquainted with them, I suggest you start by signing up to a free account of BEE.
Unless one comes from a technical background, I am going to make the assumption here that most email marketers’ entry into the email marketing world originated in some kind of drag and drop builder. I can say with certainty that BEE is one of the best on the market, and I’ll show you why below.

The signup process
BEE offers a free subscription. No, not just a free trial. A free forever option. Personally, this is my favorite option for a SaaS tool. I have a handful of paid SaaS subscriptions myself including and not limited to:
But the only reason why I converted to a paid subscription of those, is because I acquainted myself with the tool under no pressure on their free plan, and then understood the value of the paid plans and converted. This is something I foresee many will do with BEE as well, as the paid features can heavily contribute to team collaboration and scalable design systems across an org.
Signing up to BEE was quick and easy, and in no time I landed in my workspace.

I also received a fantastic welcome email from them outlining key-value pieces of their platform.
From the tips, I love the mention that you can convert an email into a landing page, and vice versa (this is probably a tip I wouldn’t have discovered on my own, or sought out).
I also really love that there are multiple resources I can lean on to use the product. Youtube, blog, a whole community… what more could you want!?

The tool itself
When it comes to using the tool, you can start by creating a new email from the button in the top right. Although BEE offers thousands of existing templates, I think there’s benefit in starting from scratch to really understand the various features You’ll notice that there is a fantastic 30-second getting started Youtube guide available to you that is advertised on your first email creation.

Lets break the above down:
Toggle a desktop preview of your email
Toggle a mobile preview of your email
Your email - this is where you’ll drag all your blocks from the righthand selection to build your email
Content - a selection of pre-defined blocks
Rows - want to create a two column email? Select a row with two columns to drag into your email, then select the content blocks of you choosing to drag into both columns
Settings - a variety of global style settings including content width and language (screenshot below)
7. Title - your email header/H1 should you want one
8. Paragraph text - ie. body copy
9. Lists - easily drag ordered or unordered lists into your email copy, select from multiple icons to represent unordered lists
10. Images - this will prompt you to upload from your BEE media library, upload from your computer, or select from free stock imagery
11. Button - customize a CTA button for your email
12. Divider - insert a line divider
13 Spacer - insert a spacer and customize the padding width
14. Social - continue to build your brand relationships by dragging including links to your social
15. HTML - drag in HTML blocks should you wish to spice up your email with HTML or CSS. Previously, I have used these blocks for Liquid language or inserting HTML for using custom fonts.
And so forth…

Sharing your ready to send email comes with ease. You can share a link to the browser version of your email - check mine out! Very good quality, yes, I know.

Or, you can export your email via multiple methods. And additionally send a test, generate a page, or create a template. SO many options.

Fun features
Aside from the core functionalities, there are some key features of BEE that might not be apparent to the naked eye, but are absolutely fantastic and crucial in my day to day use of BEE (IMHO).
Mobile/Desktop toggling. Select a piece of content, and then toggle it on or off for desktop or mobile via the toggle option in the bottom right of the below image. Oftentimes when I am building email, I may only want to show a feature or button on desktop, but not on mobile. Why?
Brands with a mobile app component may want to drive a CTA on mobile into their app, and to a blog article or somewhere different on desktop. Without going into the deeplink/universal link chat here, being able to have one version of a CTA on mobile, and another on desktop is key.
Images. Do you have text overtop of an image? Have you noticed that if you’re sending a mostly all image email, with text included in the email, that it can be incredibly hard to read the text on mobile because the image doesn’t scale? Leveraging this “Hide on” feature can allow you to use a specific image for mobile, and a specific image for desktop, allowing you to be accessible as possible to your subscribers.

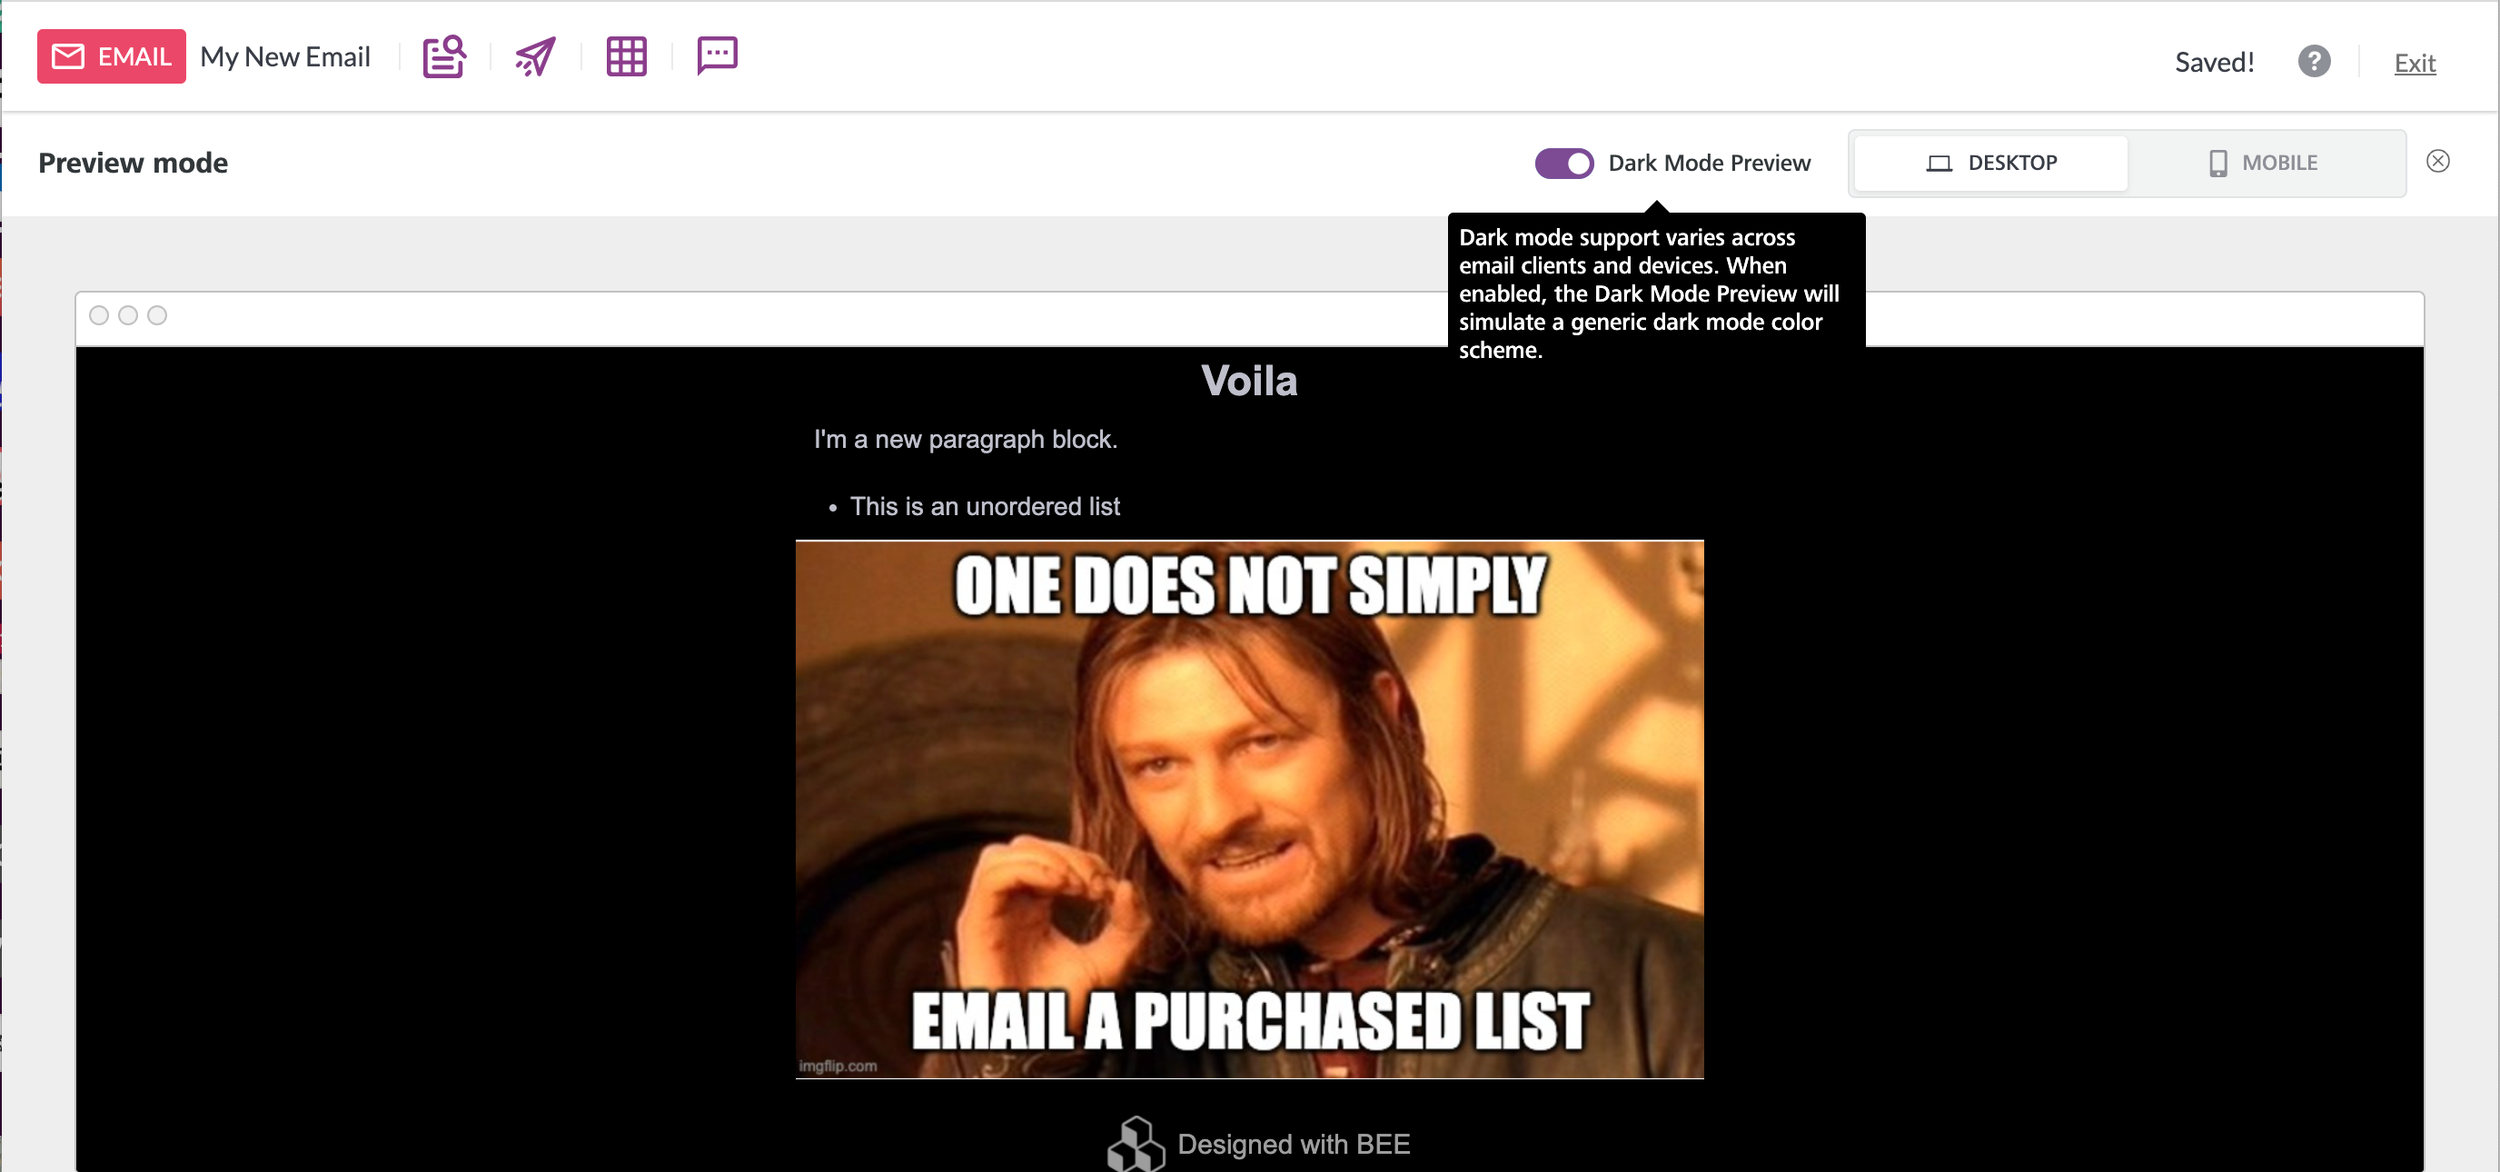
Dark mode. It can be difficult to predict what will invert or shift when the dreaded dark mode takes over. But BEE has made it easy to plan for via their dark mode preview. Something to keep in mind is that dark mode is device-specific. This is a general flip of the switch as to what could potentially invert in your email, so BEE (and me) recommend continuing to test on various email clients.
Saved blocks. It’s likely that if you are continually creating emails for one brand, that some blocks like a logo, CTA, or footer will remain constant. Instead of building them uniquely each time you use BEE, you can save a static element by toggling the row, and then saving the entire row’s contents to leverage in your next email. The free plan offers 2 free Saved Blocks, and I would absolutely upgrade my account to leverage more of them.

What makes BEE unique
With BEE being the white-labeled drag and drop builder of choice for many ESPs, it’s a tool you want to have experience with. For the first 4 years of my career, I was scared to touch any kind of custom HTML or code for the fear of not knowing where to start. I owe it to companies like BEE for my success in being able to create email while at the same time exploring opportunities to customize them via things like the HTML block.
Working at Braze in 2019, the BEE builder didn’t exist as a white-labeled tool, meaning marketers needed to leverage HTML and block editors. It was a pain point in my experience for a lot of customers I onboarded who shared the same fears of not knowing where to start with the technicalities of HTML. Being able to now leverage BEE inside of Braze is an absolutely game-changing feature to an already powerful marketing automation tool.
I will conclude this by disclosing that although ESP’s white-label BEE, some features of BEE are unique to them and the ESP may have not caught up in turning them on if available to them. As I write this in April 2022, Saved Blocks are not available to me in Braze (and I desperately wish they were)!
If you are a freelancer or email marketer wanting a dashboard training session on BEE as a standalone tool, or a walkthrough of its capabilities inside an ESP, please don’t hesitate to reach out!